 We woke to a frost on Wednesday morning - as you see from the lettuce (Lollo Rosso) here. Yesterday was a glorious day - mild and sunny. We were told to expect fog this morning - no fog materialised! A gentle morning with even a little sunshine
So, when does autumn end and winter begin? There are two answers to this question. The meteorological answer is that the winter season begins on Tuesday - that being the first day of December. Meteorologists go by the calendar month so winter comprises December, January and February
If you take you cue from the sun and the movement of the earth around it - and also the tilt of the planet - then you get a different answer: winter does not start until 22nd December. This is the winter solstice when the daylength is at its shortest. Codger keeps track of this by observing the sunrise - study window faces directly south-east. At this time of year, that is where the sun rises. Each morning it processes a little to the right (westwards) until just before Christmas and then moves back again. By the time we reach the longest day (21st June) the rising sun appears way, way to the east - almost out of my angle of view from the window
Chrysanthemums frosted on Wednesday
 |
| The same flowers yesterday |
‘As long as the earth endures,
seedtime and harvest,
cold and heat,
summer and winter,
day and night
will never cease.’

Sunrise over Tipton as seen from our back garden on Monday (24th November)
If you have still dahlias in flower you may have found that the foliage got knocked back by the frost. Probably the remaining blooms going over, too. A necessary reminder that action is needed as the season turns
In a Tipton front garden this week - 12" across!
If your dahlia is in a pot, it might be sufficient to simply put the pot in a frost-free place such as a garage or shed. Wise, though, to slip it out of the pot first just to check that all is well - removing the foliage, first. Then, next season, pot on with fresh compost - or plant out. In any doubt, proceed as next ...
Overwintering tubers
With milder winters, it is increasingly common to leave dahlias undisturbed. My soil is clay, so tubers tend to rot during the cold months. So I dig them up and store them away from the frost. If you have sandy soil, you can risk it but here's how if you plan to lift them ...
Use a fork to loosen the soil around the plant and lift the clump - soil and all. Choose a dry day and shake as much soil from the roots as possible. I then put the clump in a tub and blast with a hose to remove the rest of the soil. I recommend labelling at this early stage as, when doing several, it is easy to get mixed up
Cut away the foliage to about an inch and leave them to dry, upside down, for a couple of day. When you are handling them you will soon spot tubers that need to be removed. When big advantage of doing things this way is disease prevention. Older tubers tend to rot off and should be cut away
You may spot some damage
Once dry, the labelled tubers can be stored. I deploy used potting compost that I have kept back for this precise purpose. A cardboard box makes an adequate container - ideal, in fact, it that it will 'breathe'. Put a layer of compost material down and lay out the tubers, covering with more compost as you go
Some gardeners use sand - but sand weighs heavy! I keep my boxes of tubers at the back of the garage marked DAHLIAS! - yes, old Codger is becoming forgetful
Enjoy doing the job knowing that you are preparing for a great display next year! Codger is planning to give dahlias a push in the Spring so look out then. In the meantime there is another job to do now that will give you the benefit next year ...
There's an 'ole in my bucket
I must resist the temptation to become political at this point. As I was listening to the Chancellor's Autumn Statement, I could not help thinking of last week's Reader's Letter and a slight revision to the song. "There's hole is my budget, dear Rishi, dear Rishi ..." and the reply "Well, mend it, dear Boris, dear Boris ..." Or, perhaps, the names should be reversed
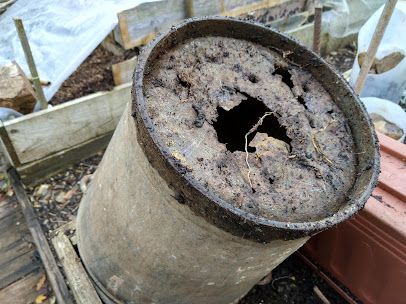
Be that as it may (and I do not envy politicians just at the moment), the hole in our reader's bucket can be turned to advantage. Here is Codger's bucket - as shown here, truly worthy of Salvage Hunters, The Repair Shop and Flog It! rolled into one
I'll set out the instructions step by step ...
Step One. Cut out the bottom of an old plastic pot and place in the bucket to cover the hole. This will allow the bucket to be used as a planter. The soil will be retained whilst the drainage will be good
Step Two
Knock up a good compost mix for bulbs. Codger's recipe can be found in the post dated 16th October.
The main point is that potting compost straight out of the bag is not 'open' enough for bulbs which do not like to be wet
If at all possible add some grit and some vermiculite
Step Three
Put a bottom layer into the bucket (or other container)
Place a ring of tulip bulbs as in the photograph. Close planting is in order - don't worry about the spacing info on the packet

The finished result - all that is now needed is patience!
Step Four
Add more compost and repeat. This time you could try some other type of bulb such as a hyacinth or crocus. With a container the size of the bucket you would easily get three or four layers
Rather than ask you to read a thousand words, simply take a look at this video - one of very many covering the same topic on YouTube. This one is beautifully clear and - a rather interesting point- the appellation names our Dutch friends as the originators of the 'bulb lasagna' (rather than the Italians!)
[Brief reminder: sometimes a video might have a commercial interest; for example it may be produced for a nursery and garden supplier. Please note that where that occurs it is entirely coincidental. Codger has no commercial links whatsoever. He does not receive expenses. And all donations go in their entirety to BCM. See here for donations]
Bulb lasagna for you!
Just as I was typing the above paragraphs the doorbell rang - a delivery, PTL!
You may remember that I was completely out of suitable containers and was having difficulty at sourcing what was needed. Problem solved, so if you would like your own bulb lasagna that it now possible
The new delivery (ten pots) shown here looks great. The pots are 10" diameter plastic and have an attractive copper-effect finish
We also have a few, slighter bigger, of a different design. Please see the photo below
You can still help BCM Toylink!
At the beginning of Lockdown 2.0 we announced that all donations made during the restrictions would be devoted devoted to the excellent BCM Toylink initiative. Your generosity is appreciated but time is short as BCM staff have to purchase, box up and deliver before Christmas
rather bigger - a few 12" pots also available
As an extra encouragement we are offer to our readers all the bulb lasagnas I can plant up this week. Please contact me immediately if you would like one. Please note that we do not sell - that would take us outside the Gift Aid scheme - we simply ask that you consider making a donation to BCM via the link above. We can handle cash, if you wish, but online is preferable
So, there's work to do! Must get on ... ...
... from your old friend the Garden Codger
and a couple of bonus shots

Tula chrysanthemum - with frost ...


